
How to Duplicate a Page in Elementor
![]() by Fabio Peters
by Fabio Peters
In the ever-evolving world of web design, crafting a captivating and user-friendly website has become both an art and a science.
Enter Elementor, the game-changer that has revolutionized the way we create websites on WordPress. It’s the toolkit that empowers you to turn your wildest design dreams into digital reality, one pixel at a time.
But what if you’ve spent countless hours perfecting a page layout and want to replicate that masterpiece without starting from scratch? That’s where the magic of duplicating a page in Elementor comes into play, and in this guide, we’re about to unlock the secret to effortlessly cloning your web pages like a pro.
Say goodbye to tedious repetition and hello to efficiency and creativity as we dive deep into the art of duplicating pages in Elementor!
What is Elementor?
Elementor is a popular and powerful drag-and-drop page builder plugin for WordPress, designed to make website creation and customization accessible to everyone, regardless of technical expertise. It has gained immense popularity among web developers, designers, and business owners because of its user-friendly interface and the ability to create visually stunning and highly functional websites without having to write a single line of code.
One essential feature that Elementor offers is the ability to duplicate web pages. Duplicating web pages is a crucial function for various reasons:
Template Creation: Duplicating pages allows you to create templates or layouts that can be reused across your website. This is particularly useful when you want a consistent design or structure for different sections of your site, such as headers, footers, or product pages.
A/B Testing: When you’re experimenting with different page elements or content variations to optimize your website’s performance, duplicating pages makes it easy to create multiple versions for A/B testing. This enables you to assess which version resonates better with your audience and improves conversion rates.
Content Repurposing: If you have content that you want to reuse or repurpose for different pages or sections, duplicating pages serves as a time-saving method. You can duplicate a page and then customize the duplicated version to suit its new purpose.
Faster Development: When building a new page or section that shares similarities with an existing one, duplicating the original page provides a starting point, saving you time and effort in recreating the layout or design from scratch.
Backup and Safety: Duplicating pages also acts as a form of backup. If you’re making major changes to a page and want to preserve the original version, duplicating it ensures that you have a safety net in case anything goes wrong during the editing process.

In essence, Elementor’s page duplication feature is a valuable tool that enhances productivity, creativity, and flexibility when designing and managing websites. It simplifies the process of creating, testing, and maintaining web pages, making it an indispensable feature for web professionals and site owners alike.
Elementor has established itself as one of the most popular and user-friendly page builders for WordPress. Its intuitive drag-and-drop interface empowers users to design stunning websites without needing to write a single line of code.
One of the essential features that can significantly enhance your web design workflow is the ability to duplicate pages effortlessly. In this article, we’ll walk you through the steps to duplicate a page in Elementor, highlighting the benefits it brings to your design process.
Why Duplicate a Page in Elementor?
Duplicating a page might seem like a straightforward action, but its impact on your web design workflow can be substantial. Here are a few reasons why duplicating a page in Elementor can be highly beneficial:
Time Efficiency: Whether you’re creating similar landing pages, product pages, or blog post layouts, duplicating a page allows you to retain the design structure while making necessary content changes. This approach saves you from starting from scratch and expedites the design process.
Consistency: When you maintain a consistent design across your website, it enhances user experience and reinforces your brand identity. Duplicating a well-designed page ensures uniformity in design elements, such as headers, footers, and sidebars.
Experimentation: Before making significant design changes to a live page, you might want to test different layouts or styles. By duplicating the page, you can experiment freely without affecting the original content.
Content Updates: If you frequently publish content using a specific layout, like blog posts, duplicating a page lets you maintain the structure while updating the content. This is particularly useful if you have a predefined layout for different types of content.
How to Duplicate a Page in Elementor
Duplicating a page in Elementor is a straightforward process. Here’s a step-by-step guide to help you duplicate a page:
Log in to WordPress Dashboard
Log in to your WordPress admin panel using your credentials.
Accessing your WordPress dashboard is the first crucial step towards duplicating a page using Elementor. The dashboard is your website’s control center, where you manage all aspects of your site, including content, design, plugins, and settings.
Follow these steps to log in:
- Open Your Browser: Launch your preferred web browser and enter your website’s URL in the address bar. For example, if your website is “www.yourwebsite.com,” type that in.
- Add “/wp-admin”: After your website’s URL, add “/wp-admin” to the address. This is the default login URL for WordPress. So, if your website is “www.yourwebsite.com,” your login URL will be “www.yourwebsite.com/wp-admin.”
- Press Enter: Hit the Enter key or click the “Go” button to navigate to the login page.
- Enter Your Credentials: On the login page, you’ll see fields to enter your username and password. These are the credentials you set up during the WordPress installation process.
- Click “Log In”: After entering your username and password, click the “Log In” button to access your WordPress dashboard.
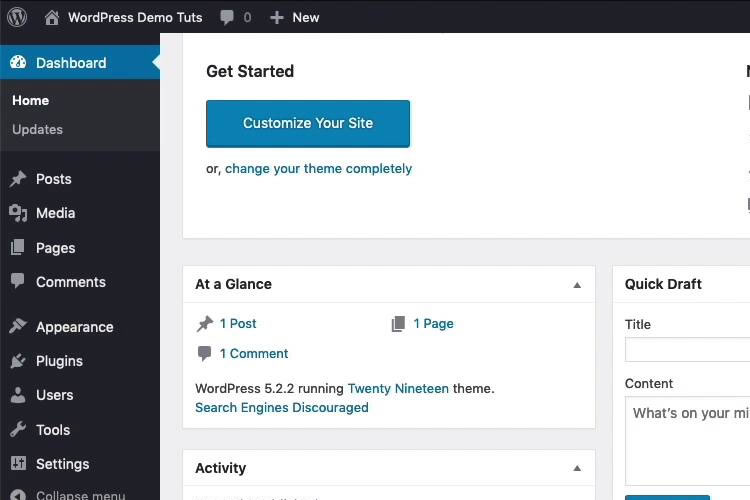
Dashboard Overview
Once you’ve successfully logged in, you’ll be greeted with the WordPress dashboard. This is your central hub for managing your website’s content, appearance, functionality, and more.
Access the Page Editor
Navigate to the page you want to duplicate. Click on “Edit with Elementor” to open the page in the Elementor editor.
After successfully logging in to your WordPress dashboard, the next crucial step in duplicating a page using Elementor is to access the page editor. This is where you’ll work your creative magic and make changes to your web pages.
Here’s how to do it:
- Navigate to the “Pages” Section: From the WordPress dashboard’s main navigation menu on the left-hand side, locate and click on the “Pages” tab. This will open a submenu showing options related to pages.
- Select the Page to Duplicate: In the submenu, find and click on the page that you want to duplicate. This will take you to the page’s editing interface.
- Enter the Elementor Editor: Once you’re on the page’s editing interface, look for the “Edit with Elementor” button. It’s usually located at the top of the page, near the title or in a prominent area. Click on this button to launch the Elementor editor.
- Wait for the Editor to Load: The Elementor editor may take a moment to load, depending on your website’s speed and complexity. Once it’s fully loaded, you’ll be presented with a visual representation of your page and a set of editing tools.
Navigating the Elementor Editor
The Elementor editor is designed to provide you with an intuitive and visually appealing environment for creating and customizing web pages.
Here are some key elements of the editor:
Elements Panel: On the left-hand side of the editor, you’ll find the Elements panel. This is where you can browse and select various widgets and elements to add to your page. These elements can include headings, images, text blocks, buttons, forms, and more.
Canvas: The main area of the editor is the canvas. This is where you’ll see a live preview of your page’s design. You can drag and drop elements from the Elements panel onto the canvas and arrange them to create your desired layout.
Editing Toolbar: Above the canvas, you’ll find the editing toolbar. This toolbar provides options to edit the selected element’s content, style, and settings. It also allows you to undo/redo actions, preview your page, and save your changes.
Navigator: On the bottom left of the editor, there’s a Navigator panel. This panel provides an overview of all the elements on your page and allows you to easily navigate through complex layouts.
Responsive Editing: Elementor supports responsive design, which means you can switch between different device views (desktop, tablet, mobile) to ensure your page looks great on various screen sizes.
Global and Page Settings: At the bottom left of the editor, you’ll find buttons to access global settings (affecting the entire website) and page settings (specific to the current page).
Editing and Duplicating within Elementor
With the Elementor editor open, you have full creative control over your page’s design and content. To duplicate the page, you’ll need to follow the steps outlined in the previous responses, which involve saving the page as a template and then inserting that template to create a duplicate.
However, while you’re in the Elementor editor, you can also make various other changes to your page’s layout, style, and content.
You can:
- Drag and drop elements onto the canvas to add new sections and content blocks.
- Customize the appearance of each element using the editing toolbar’s styling options.
- Rearrange elements by simply dragging them around the canvas.
- Add dynamic content using dynamic widgets such as post lists, archives, and more.
- Preview your changes in real-time to see how they’ll appear on different devices.
Save as Template
Once the page is loaded in the editor, click on the folder icon at the bottom of the screen. This icon represents the Elementor template library.
In the template library popup, click on the “Save as Template” tab.
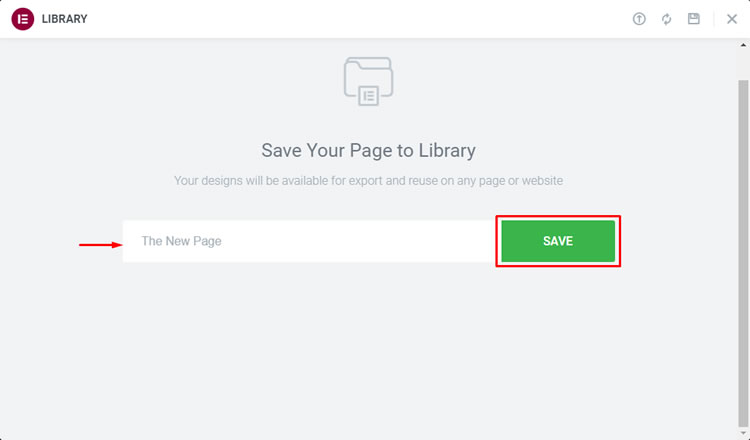
Provide Template Details
A dialog box will appear, prompting you to give your template a name and description. Fill in these details to help you identify the duplicated page template.
Save Template
After naming the template, click the “Save” button. Elementor will save the current page as a template.
Access Saved Templates
To access your saved templates, click on the folder icon again and navigate to the “Saved Templates” tab.
Import Template
Under the “Saved Templates” tab, you’ll see the template you just created. Hover over it, and click the “Insert” button to import the template.
Choose Location
A new dialog will appear, asking you where you want to insert the template. Select the appropriate option based on your needs.
Edit Duplicated Page
Once inserted, you’ll notice that the duplicated page template has been added to your current page. You can now edit the content, images, and other elements while retaining the original design structure.
Update and Publish
After making the necessary changes, click the “Update” or “Publish” button to save your duplicated and modified page.
Conclusion
Duplicating a page in Elementor is a powerful technique that can significantly enhance your web design process. By allowing you to maintain consistent design elements, experiment freely, and save time on repetitive layouts, this feature streamlines your workflow and contributes to a more efficient and professional website development process. Whether you’re a seasoned web designer or a beginner, mastering the art of duplicating pages in Elementor is a skill that can elevate the quality of your web projects.
Editorial Process:
The reviews on this site are crafted through diligent research, collecting expert insights, and drawing from genuine, real-world experience. You can learn more about our editorial process here.
It’s worth noting that certain links within this article may be affiliate links. This means that if you choose to purchase a paid plan through these links, we may receive compensation at no extra cost to you. Rest assured, these are products and services that we have personally tested, used, and wholeheartedly endorse. We want to emphasize that our website is not intended to offer financial advice. Your trust and satisfaction are our top priorities.

